File Setup
Photoshop Image Size and Resolution - Adobe
Before you start working on your pages, you want to make sure they’re set up properly. I always like to make sure my pages are formatted to be print ready, even if I don’t plan on printing them. You never know what you might want to do with your work in the future so it’s better to be safe and have your pages ready for anything.
If you’re working with pencils and paper, you can generally find paper with the right page size for your art at any crafts store.
If you’re working digital, Print Ninja made this awesome guide for setting up print ready pages. The tutorials are specific to Photoshop, InDesign and Illustrator but most of it applies to any digital platform you could use. Make sure to check it out!
Page Dimensions
Make sure that before you start drawing, you know what the dimensions of your pages will be.
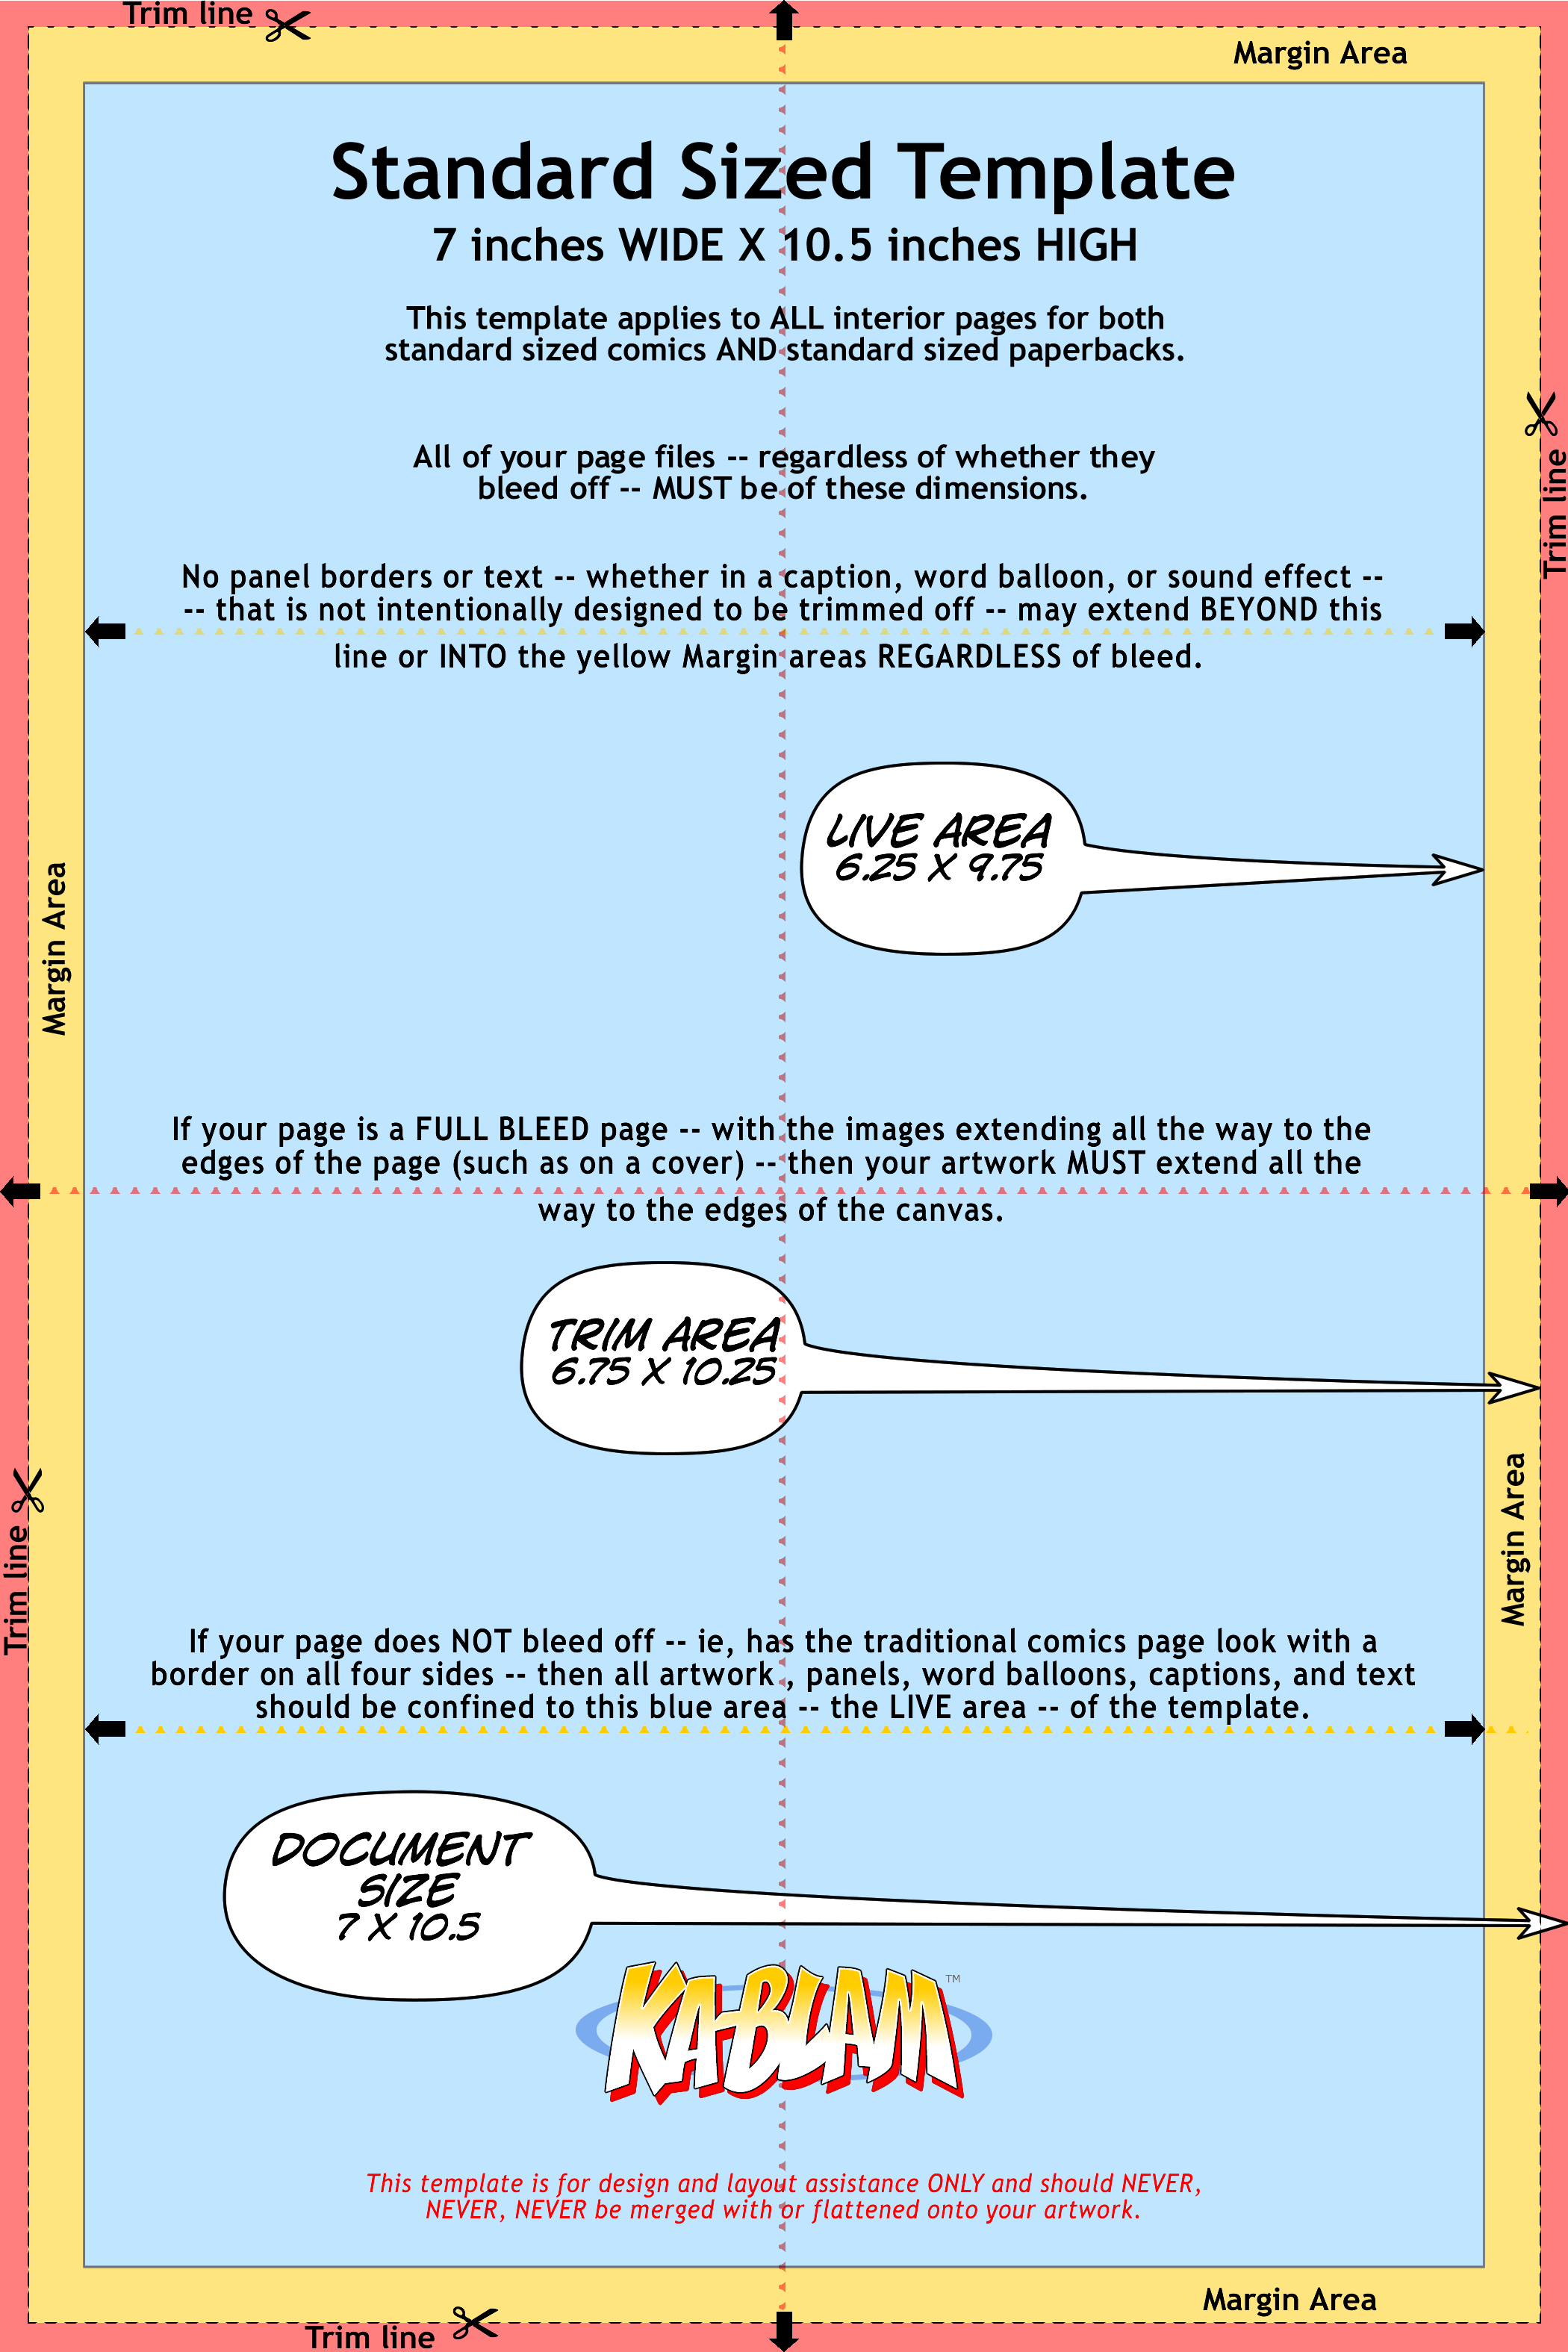
The standard single issue comic is 6.625 x 10.25 inches after trim (6.875 x 10.5 inches full bleed). Check out this great comic template by Ka-blam for a visual representation of the standard page format.
While that format is the established norm, by no means do you have to obey that standard. Comics come in all shapes and sizes. My preferred sizing for graphic novels is 6 x 9 inches but really you can do whatever size you want. Just note that not all printers support all page dimensions. Make sure to take that into consideration when reaching out to printers.
Something to note is that many artists like to draw at much higher sizes and scale their images down for printing. This is so the shrunk down files look more crisp, and so the artist can have the option of printing larger images for things like posters.
This is the case for traditional art as well. 6.625 x 10.25 inch comics are often originally drawn on 11 x 17 inch templates and shrunk down later after scanning in the pages.
If you decide to work in larger sizes, make sure your page ratio stays the same.
For example: if your dimensions are 5 inches by 10 inches, your page ratio is 0.5 (5 divided by 10). This means you can work with a 20 inches by 40 inches file because they have the same ratio (20 divided by 40 is still 0.5).
A consequence of working at a larger scale is that your digital files can get very big. This can slow down your computer and file uploads, so it’s up to you what you want to do.
Resolution
There’s nothing worse than drawing up your entire comic then realizing when you go to print that you’ve been working at too low a resolution.
The resolution is essentially how high quality your images and prints are. Most printers print at 300 DPI (dots per inch) though some allow for more DPI. Feel free to work at a higher DPI than that, but you won’t get a clearer image by printing files at a higher DPI than what the printer is capable of.
Important to note, is that for black and white comics, 300 DPI is often too low resolution and will result in blurred lines. Many artists that work in black and white will set their files to 600 DPI or higher to get the most crisp art.
Also important: Believe it or not, computers have a much lower resolution than printed books. My laptop is 118 PPI (pixels per inch) and many say that a “high enough” resolution for digital only files is 72 DPI. Just because something looks good on your computer doesn’t mean it will in print, so make sure your images are at high enough resolution!
Table of Contents
Intro
Before You Start
Writing
- Overview
- It All Starts With An Idea
- Thought Dumping
- Outlining
- World Building
- Characters
- Writing Scenes
- Breaking Scenes Down
- Scripts
- Dialogue
- Revision
- Choosing A Title
- Writer's Block
Hiring A Team
- Overview
- Sorting Out Your Budget
- Writing A Solicitation
- Where To Find Your Team
- What Makes A Good Partner
- Contracts
Drawing
Colouring
Lettering
- Overview
- General Tips
- Standard Black vs Rich Black
- Choosing A Font
- Font Types
- When To Bold Text
- Sound Effects
Marketing
Publishing
Printing
- Overview
- Getting Print Ready Files
- Offset vs Digital Printers
- Why Page Count Matters
- Book Formats And Binding Types
- How Many Copies To Print
- Aesthetics
- Tips For Saving Money
- Printer Comparison Table